DLTK's Holiday Crafts for Kids
 Tin Can Pumpkin Outdoor Decoration
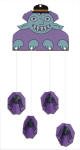
Thanks to Sandra for this idea! She wrote: "It's also a nice recycle idea and you will just have to change the designs and colors so you will be able to use it for other occasions as well."
We like to use acrylic paint for most of our projects. It is fairly easy to find and inexpensive -- we usually buy ours from the dollar store in the neighbourhood but we also sometimes get it at the craft store or Amazon. I like that it comes in small containers in a zillion colors so I can shop for the colors I need for each project without feeling guilty about waste. Acrylic paint is waterproof so it can sit outside. It is cleanable if you wipe it up while it's still wet. It dries fairly quickly so children don't end up sitting around waiting for the various stages of the project.
Materials:
- clean can (we used a coffee can, but you can use a can of any size… just make sure it has no sharp edges)
- orange and black paint
- paint brushes
- orange plastic garbage bag
- tape
- scissors
- hammer and nail
- yarn or string.
Instructions:
- Turn the can upside down. This is very important as the bottom of the can is going to become the top of your craft and we don't want to paint the face on backwards.
- Paint the outside of the can, including the bottom, orange.
- Let dry.
 Paint
a jack o'lantern face onto the can. A basic jack o'lantern has triangle
eyes and nose with a big grin with a tooth or two
Paint
a jack o'lantern face onto the can. A basic jack o'lantern has triangle
eyes and nose with a big grin with a tooth or two- Cut the plastic garbage bag into strips. For a coffee can, we made our strips about 1 inch wide by 2 feet long.
- Tape or glue the plastic strips to the inside of the can so they hang down. Duct tape works well if you live in a humid climate.
- Use the hammer and nail (or a hole punch) to put two holes in the top of the can (what used to be the bottom) and pull the string or yarn through these holes so that you can hang your pumpkin.
Printable version of these instructions