DLTK's Holiday Crafts for Kids
Chalk Pastel Stencil Art - Halloween Bat, Cat or Ghost
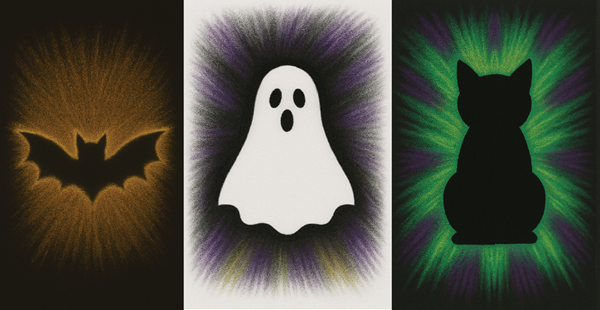
I've provided three different stencils (a bat, a cat and a ghost) that should work well for children in grade school.
You’ll end up with a glowing silhouette in the middle where the stencil was. Perfect for Halloween!
This is an art project that is very, very, very messy - some kids (my daughter Kaitlyn) LOVE messy art while others absolutely hate it.
For a similar but MUCH tidier craft project with simpler supplies using the same stencil templates I've provided, try collage art.
Materials:
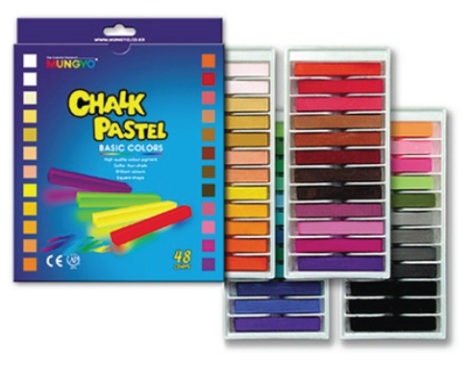 Chalk pastels/Soft pastels/Paper chalk (Mungyo is my favorite, they’re soft and smudge beautifully).
- You want a soft pastel or chalk pastel. The names are used interchangably.
- This isn't sidewalk chalk nor is it oil pastels, it's something different and it's easy to find.
- Black paper
- Simple bat stencil (template provided at the bottom of this page)
- Painter’s tape (roll small pieces for the back of the stencil)
– or – stencil spray glue - Fixative spray or cheap hair spray
- Paper towels, old rags or baby wipes for cleanup
- plastic table cloth or newspaper.
Instructions:
- Print out the craft template of choice.
- Optional: Sturdier Template
- Quick note... I rarely use this option. I let the kids cut out the templates and just use the paper as a stencil. It's more independent and works fine for a single use. That paper stencil gets a bit messed up by the chalk and depending on your luck that can end up quite pretty to glue onto a piece of construction paper as a second piece of art! Otherwise, you can just throw it away.
Anyways... on to the sturdier template instructions: - Glue the template onto a piece of thin cardboard like a cereal box. There are pros and cons to this... it makes the stencil sturdier so it can be reused but it makes it tougher to cut out and you have to wait for the glue to dry.
- Create the cardboard stencil a day or two before craft day. If you want to make it even sturdier, you can cover it in packing tape before you cut it out. The packing tape makes it a bit more plasticy so that mess can be wiped off before storing or reusing.
- Quick note... I rarely use this option. I let the kids cut out the templates and just use the paper as a stencil. It's more independent and works fine for a single use. That paper stencil gets a bit messed up by the chalk and depending on your luck that can end up quite pretty to glue onto a piece of construction paper as a second piece of art! Otherwise, you can just throw it away.
- Cut out the template to create your stencil.
- Protect your work surface with newspaper or a plastic tablecloth. Chalk pastel dust travels!
- Tell the kids to get into their art shirts (dad's old dress shirts or whatever) and mentally prepare themselves to stay at the table and GET MESSY!
Pro tip... Please don't pet the dog with chalky hands... *sigh*
- Place the black paper flat on the table
- I like actual chalk pastel black paper -- you can get it from craft stores, art stores and usually Staples and Walmart. Chalk pastel paper is a bit rough which helps make the colors pop and stick.
- Construction paper isn't too bad, though not as good as chalk pastel paper.
- Cardstock is too smooth and doesn't work.
- Attach the stencil to the paper using stencil glue or loops of painters tape. The child should use their second hand to hold the stencil down during the project, but don't try this without at least some tape or glue to hold it in place. For the bat, we used 6 small loops of tape
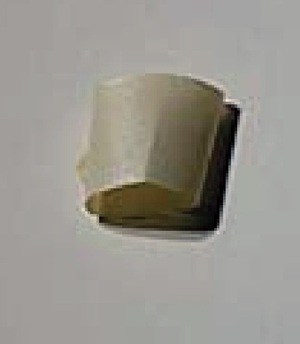 I don't know what to call a tape loop, lol. I'll try to describe it.
You take a 2 or 3 inch piece of tape and loop it to stick to itself, sticky side out to make a double sided tape loop... who knew this would be the toughest part of the instructions!
We make tape loops every week but I'm not sure there's a good word for them.
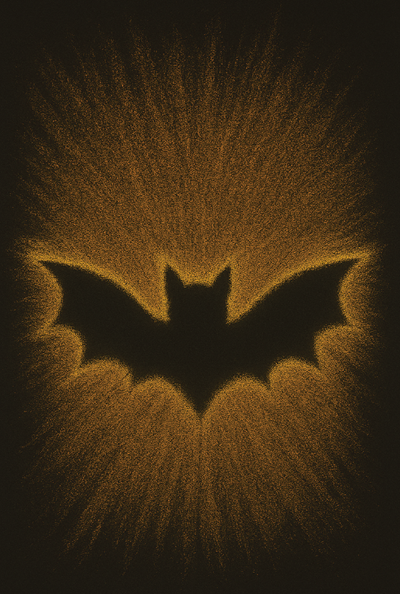 Choose your colors (for the bat, I picked warm colors -- golds, and oranges). Keep them on one paper plate for easy reach.
- Choose your main color. My main color was gold
- Choose one or two colors that are close on the color wheel (likely beside each other in the box of chalk pastels). I chose a lighter yellow and a darker orange.
That's it! No more colors and here's why....
All the rules of color mixing fly out the window with chalk pastels. Red plus blue won't make purple, they'll make a mucky mess. Keep the colors few and similar and you get a beautiful result. Get too carried away and the kids will walk away disappointed.
So! When using chalk pastels, I usually try to use two or three similar shades (for the bat, golds and oranges) rather than throwing the whole crayon box at it. - I also like breaking really big chalk pastels in half as I find half pieces more manageable for kids. Some brands come smaller already but the ones I use are long sticks that I break into two or three pieces.
-
Have your child trace boldly around the edges of the bat stencil.
- The lines should be thick and bright but just simple solid or dashed lines.
- I usually use dashed lines and alternate between my two or three colors.
- I dash all the way around in my main color (gold), then put down that chalk.
- Pick up my lighter color (yellow) and fill in half the dashes.
- Then pick up my final darker color (orange) and fill in the remaining dashes.
- I try not to swap back and forth between colors too much as the color from your hands will get onto the chalk pastels and vice versa.
- DO NOT clean your hands. Just put the chalk down on a plate when you're done using it and leave your hands dirty. Chalk pastels are water soluble so if you get damp hands on them, they won't cooperate anymore. Embrace the mess -- you are one with the chalk until you're done. Lol
- You aren't coloring to get the final effect. You can add a few light lines radiating out from your stencil, but not too many.
- Mainly, you're outlining and then smudging!
- Once outlined, the messy fun begins!
- Resist the temptation to peek under your stencil. Keep using your off hand to hold the stencil down firmly to the paper as you smudge with your main hand fingers.
- Smudge the chalk outward with one fingertip to make a glowing effect around the stencil.
- Nothing else works as well as your fingers so don't even bother trying. If you can't stand the mess, this isn't the project for you. Chalk pastels want to be finger smudged!
- DO NOT use your whole hand... fun as that might seem.
- Smudging straight out like an explosion from the center gives the best effect.
- DO NOT clean your hands until you're done. Chalk pastels are water soluble so you don't want damp hands touching your art.
- now stop everything!
- We don't want our dirty fingers messing up our final product.
- Put away your chalk pastels. You can store them in the box to begin with, but if you use them quite a bit, you'll eventually want plastic containers where you store like colors together. One container for black, one for white, one or two for warm colors and one or two for cool colors.
- Use old rags or baby wipes to get the chaos, er I mean chalk, under control.
- You don't need to be perfectly clean yet, but you want your hands tidy enough that you aren't turning things (like the family dog) a rainbow of colors when you touch them.
- Carefully lift the stencil to reveal the crisp black shape in the center.
- If you’d like, take the finished artwork outside and lightly spray it with fixative. Let dry flat. I recommend buying chalk pastel fixative but cheap hairspray works for a short time. I prefer the chalk pastel fixative because I don't want to display something that will continue making a mess on things. At some point, the chaos must end!
- Thoroughly clean up with old rags or baby wipes. Hose down your plastic tablecloth (and the dog). Toss out the newspaper -- preferably straight outside into the trash bin. Throw your art clothes immediately into the laundry.
Options:
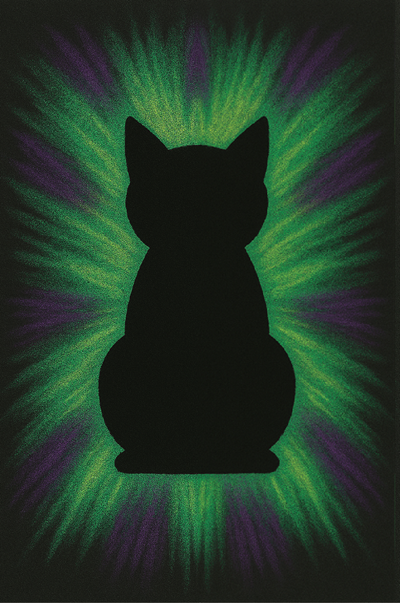 Halloween Cat:
- Use a cat stencil on black paper. Outline in bright greens, then smudge outward for a spooky nighttime glow.
Ghost:
 Use white paper with a ghost stencil. Outline in purples and maybe a bit of grey, then smudge outward. After everything was tidied but before applying the fixative, I drew in eyes and a mouth with black sharpie. I wish I hadn't. It looked cooler without them.
I did mine with black and seriously wish I hadn't. Black is a very overwhelming chalk pastel. It pretty much eliminates all the other colors. I tried to add back some color at the end but I recommend you just put that black crayon away!
Templates:
- After printing, close the template window to return to the main page.
- If the template doesn’t fit on one page, adjust your printer margins:
• In most browsers: Print → More settings → Margins → Minimum
• Or use Page Setup / Printer Setup in your printer dialog
- I prefer the smaller templates for this project. Especially for beginners.
Bat Stencil smaller or larger
Cat Stencil smaller or larger
Ghost Stencil smaller or larger
Printable version of these instructions