DLTK's Holiday Crafts for Kids
3D Paper Snowflake Craft

Materials:
- 6 squares of paper (equal sizes, the larger the squares the larger the final snowflake)
- scissors
- glue, tape, or stapler (with adult supervision if necessary)
- string
Craft Instructions:
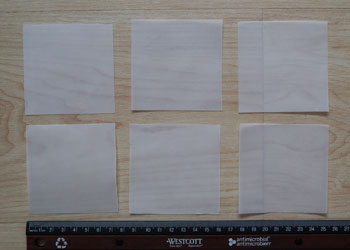 Cut out six squares of paper.
- They should all be the same size.
- The larger the squares, the larger the snowflake. It is usually a bit easier to work with larger squares.
- My squares were 7cm x 7cm and the final snowflakes ended up being about 18cm wide.
Now for each individual square:
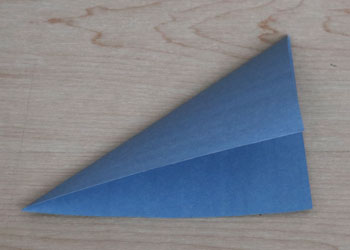 Fold the square diagonally.
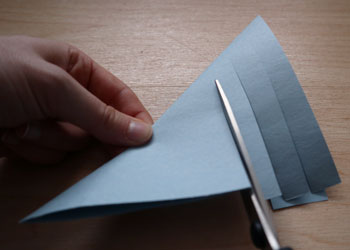 Along one of the open edges, cut strips almost up to the edge of the triangle.
- Don't cut the strips all the way across. If it helps, draw a line about a centimeter away from the folded edge.
- The strips will get consecutively shorter.
- The thinner your strips are, the more time consuming the process will be but the more detailed the snowflake will look. Don't make the strips any less than about half a centimeter to make sure your snowflake is still sturdy.
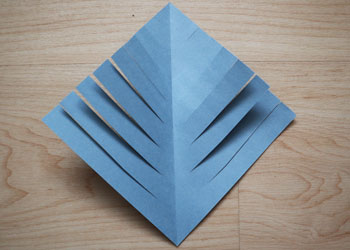 When you unfold your triangle you will have a daimond that looks a bit like a leaf.
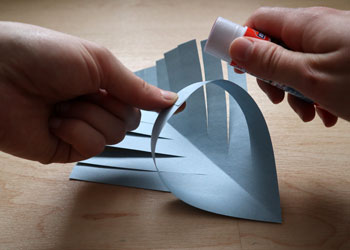 Bring two strands from opposite sides of the daimond together and secure them with a bit of glue or tape.
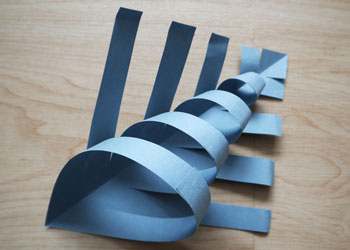 Continue to secure the pairs of strips, BUT only do this for every other pair.
- You should be left with some pairs joined and other pairs of strips still loose.
 Flip it over and secure the remaining pairs of strips together on the otherside.
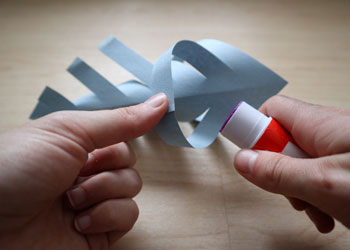
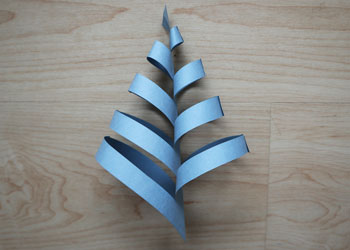 Now you should have a sort of spirally leaf-shape.
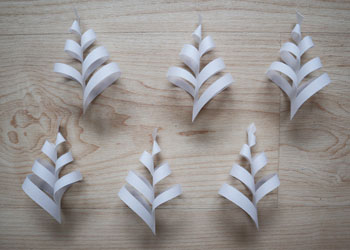 Continue to do this with the remaining five squares of paper.
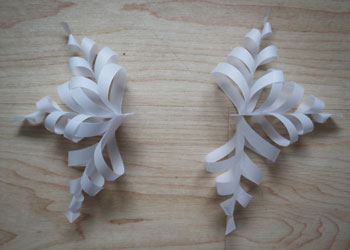 Glue the bottom corners of three snowflake leafs together to create half a snowflake.
- Glue together the bottom corners of the other three snowflake leafs.
 Secure the two halves of the snowflake together.
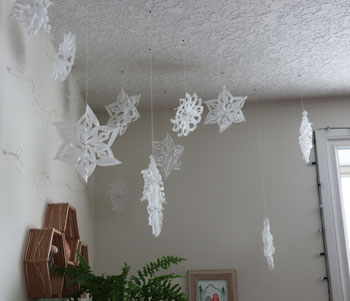 Use a string, thread, or wool to hang up your 3D snowflake! Enjoy your wonderful, wintery decor!
Printable version of these instructions